![]()
|
|
Configuring the License Manager |
After installing, the PrintShop Mail License Manager is ready to be used immediately. In most cases, you will not have to change the application preferences and/or network settings. However, if your LAN does not allow you to use certain features that are by default used by the License Manager, you might want to make some changes.
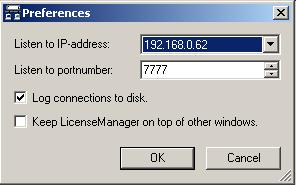
You can view and modify the preferences by clicking the button Preferences.
|
Listen to IP Address |
When you have more than one network card (NIC) in the computer running the License Manager, you can specify the IP-address of the NIC that the License Manager uses to handle connections. |
|
Listen to Portnumber |
By default, the License Manager listens to portnumber 7777. When PrintShop Mail Net is started, it tries to connect with the License Manager on that port. However, if that port is already used (for example by another process), you can change the portnumber here. Note: you may need to change this settings on the clients as well. Click here to see How to change the portnumber on the clients |
|
Log connections to disk |
The PrintShop Mail License Manager logs connections. You can directly view the log in the Log tab, but it is also possible to have License Manager generate and save a separate log file on disk; this log file will be saved in the application folder (usually C:\Program Files\Atlas Software\PrintShop Mail License Manager). The License Manager logs all incoming and outgoing requests in the log file. |
 Assigning
“Trusted Users”.
Assigning
“Trusted Users”.
The PrintShop Mail License Manager allows you to specify a list of trusted IP addresses or hosts. When this feature is enabled, a connection to the License Manager will only be allowed if the computer running the PrintShop Mail Net (client) is in this list.
This feature can be turned on by clicking on the Trusted button, and then checking the box marked "Only allow connections from one of the following IP-addresses or hostnames:". To turn off this feature, uncheck this box.
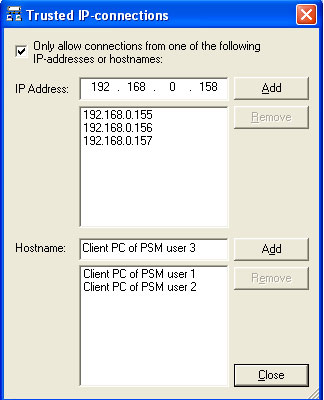
To add an IP address, type it in the box marked "IP Address". Then click on the Add button to add it to the list. To remove an IP address, select it from the list, and click the Remove button.
To add a hostname, type it in the "Hostname" text box, and then click Add to add it to the list. To remove a hostname, select it from the list, and click the Remove button.